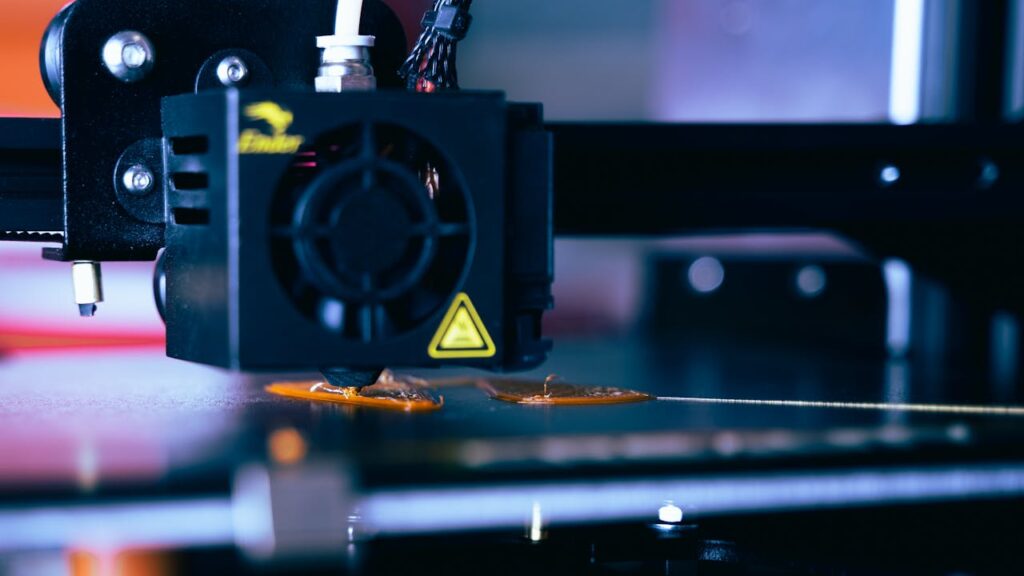
Warping – that frustrating phenomenon where the corners or edges of your 3D print lift off the build plate – is a common headache for both beginners and experienced makers. It can ruin hours of printing and leave you with a deformed final product. The good news is that with the right techniques and understanding of your materials, you can significantly reduce or even eliminate warping, especially when working with popular filaments like PLA and PETG.
At 3D Fusion, we want you to have the best possible 3D printing experience with our high-quality PLA, PLA+, Hyper PLA, and PETG filaments. That’s why we’ve put together this comprehensive guide to help you say goodbye to warping and achieve successful, flat-bottomed prints every time.
Understanding Why Warping Occurs
Before we dive into solutions, let’s briefly understand the culprit behind warping. It all comes down to differential cooling and contraction. As the hot extruded filament cools, it naturally contracts. If the bottom layers of your print cool down faster than the subsequent layers, they can contract and pull away from the build plate, leading to that characteristic upward curl. This is more pronounced in filaments with higher thermal contraction rates or when there’s poor adhesion to the bed.
Bed Adhesion: The Foundation for Warp-Free Prints
A strong bond between the first layer and the build plate is the most critical factor in preventing warping. Here’s a breakdown of essential bed adhesion techniques:
- Leveling the Bed: The Cornerstone of Success: An unlevel bed is the number one cause of poor adhesion. If the nozzle is too far from the bed in some areas and too close in others, your first layer won’t have proper contact.
- Manual Leveling: Most printers have manual leveling knobs. Use a piece of paper (standard printer paper thickness) under the nozzle at several points on the bed. Adjust the knobs until you feel slight friction when moving the paper. Repeat this process a few times to ensure accuracy.
- Auto Bed Leveling (ABL): Many modern printers come equipped with ABL. Follow your printer’s manual to properly calibrate and utilize this feature. While ABL helps compensate for minor bed imperfections, a generally level bed is still recommended.
- Cleanliness is Key: A Pristine Printing Surface: Oils, dust, and fingerprints on your build plate can significantly hinder adhesion.
- Isopropyl Alcohol: Regularly clean your build plate with isopropyl alcohol (90% or higher is best) and a clean microfiber cloth before each print. This removes residues that can prevent proper sticking. Avoid touching the build surface with your bare hands.
- Choosing the Right Build Surface: The material of your build surface plays a crucial role in adhesion.
- Glass Beds: Often provide a very flat surface. PLA generally adheres well to clean glass, especially when heated. PETG can also stick well to glass, but sometimes too well, potentially causing damage upon removal. Consider using a release agent like glue stick or hairspray with PETG on glass.
- PEI (Polyetherimide) Sheets: These are popular for their excellent adhesion with both PLA and PETG. Ensure the PEI sheet is clean. Sometimes, a light wipe with isopropyl alcohol is all that’s needed.
- BuildTak: Another popular option offering good adhesion for various filaments. Follow the manufacturer’s recommendations for cleaning.
- Adhesion Aids: When a Little Extra Help is Needed: Sometimes, your build surface alone isn’t enough, especially for larger prints or filaments prone to warping.
- Glue Stick (Water-Soluble): Applying a thin layer of water-soluble glue stick to your build plate can significantly improve PLA adhesion. It also acts as a release agent for PETG on glass, preventing it from sticking too strongly. Clean the bed with water after printing to remove glue residue.
- Hairspray (Aquanet Unscented): Similar to glue stick, a light mist of hairspray can enhance adhesion, particularly for PLA. Ensure even coverage and allow it to dry before printing.
- Painter’s Tape (Blue): This is a cost-effective option, especially for PLA. Apply strips of tape to the build plate, ensuring they slightly overlap. PLA adheres well to painter’s tape.
- Brims: A brim adds a single-layer thick outline around the base of your print, increasing the surface area in contact with the build plate. This provides extra stability and helps resist warping, especially on corners. You can adjust the number of brim lines in your slicer software. Brims are relatively easy to remove after printing.
- Rafts: A raft prints a grid-like structure underneath your actual model. This provides a large, flat surface for your print to adhere to. Rafts are more material-intensive and can sometimes leave a less smooth bottom surface on your print, but they can be very effective for challenging geometries or filaments prone to warping.
Temperature Control: Maintaining Stability Throughout the Print
Consistent temperature is crucial for preventing uneven cooling and contraction:
- Bed Temperature: The Foundation of Adhesion: Setting the correct bed temperature is vital for optimal adhesion.
- PLA: Generally prints well with a bed temperature between 50-60°C. Some PLA formulations may even print fine without a heated bed, but a heated bed significantly reduces warping risk, especially for larger prints.
- PETG: Typically requires a higher bed temperature, usually between 70-80°C. This helps the PETG adhere firmly to the build plate.
- Nozzle Temperature: Ensuring Proper Layer Bonding: While nozzle temperature isn’t the primary factor in warping, the correct temperature ensures proper melting and bonding of layers. Poor layer adhesion can indirectly contribute to warping. Refer to the filament manufacturer’s recommendations for the optimal nozzle temperature for your specific PLA and PETG.
- Ambient Temperature and Drafts: The Silent Enemies of Flat Prints: Fluctuations in ambient temperature and drafts can cause the top layers of your print to cool down too quickly compared to the bottom layers, leading to warping.
- Enclosures: Consider using an enclosure for your 3D printer, especially in drafty environments or when printing larger parts. An enclosure helps maintain a more consistent ambient temperature around the print. Even a simple cardboard box can make a difference.
- Avoid Open Windows and Doors: Keep your printer away from open windows, air conditioning vents, and doorways where drafts are likely.
Filament-Specific Considerations for PLA and PETG:
- PLA: While generally easier to print and less prone to warping than some other filaments, large PLA prints with sharp corners can still experience lifting. Focus on good bed adhesion techniques and a consistent bed temperature.
- PETG: Known for its strong adhesion, sometimes PETG can stick too well, potentially causing damage to the build plate upon removal. Ensure your bed temperature is correctly calibrated, and consider using a release agent like glue stick on glass beds. Allow the bed to cool completely before attempting to remove PETG prints.
Design Considerations: Optimizing Your Models for Warp Prevention
The design of your 3D model can also influence its susceptibility to warping:
- Large Flat Surfaces: Models with large, flat bottom surfaces are more prone to warping. Consider breaking them into smaller parts or adding features like chamfers or fillets to the edges.
- Sharp Corners: Sharp corners are often the first points to lift off the bed. Rounding or chamfering corners can help distribute stress and improve adhesion.
- “Mouse Ears”: For prints with small contact areas on corners, adding small, thin discs (often called “mouse ears”) to the corners in your slicer can increase bed adhesion in those critical areas. These can be easily snipped off after printing.
The First Layer is Crucial: Setting the Stage for Success
A well-executed first layer is the foundation for a warp-free print. Ensure your Z-offset (the distance between the nozzle and the bed at the start of the print) is correctly calibrated. The first layer should be slightly squished onto the build plate without being too thin or too thick.
Troubleshooting Warping:
If you’re still experiencing warping despite trying these tips, consider the following:
- Re-level your bed: Double-check your bed level, as it can sometimes shift during printing.
- Try different adhesion aids: Experiment with glue stick, hairspray, or painter’s tape to see which works best for your filament and build surface.
- Adjust bed temperature: Slightly increasing or decreasing the bed temperature within the recommended range might help.
- Ensure your filament is dry: Moisture in the filament can sometimes contribute to printing issues, although it’s less directly linked to warping. Store your filament in a dry environment.
Conclusion: Mastering Warp Prevention for Flawless Prints
Warping can be a frustrating obstacle in 3D printing, but by implementing these essential tips and understanding the properties of PLA and PETG, you can significantly improve your print success rate. Focus on achieving excellent bed adhesion through proper leveling, cleanliness, and the right build surface and adhesion aids. Maintain consistent temperatures and consider the design of your models. With a little experimentation and attention to detail, you’ll be well on your way to consistently producing beautiful, warp-free 3D prints with our high-quality filaments! Happy printing!

